Sunday, February 27, 2011

A Chocolatey Sunday


Greetings on this cold and icy Sunday evening. I was just out for a bit dropping of some goodies for a friend of mine that is returning home tomorrow from India. She is a neighbor, so I only had to walk across the apartment complex to deliver my little welcome home gift. What appeared to be a simple task of walking, turned into a slippery slide all the way there and back. Mind you I had the wrong shoes on to begin with, but like I said it was just across the lawn, so I didn't think it would be a big deal. Bad idea! I got to a minor slope (really minor) and found that the more I took steps to go up the more I was sliding backwards. The ground around that is covered in snow has turned to a sheet of ice and I had to hack my way to the neighbor's flat. This was not what I planned on blogging about...but there you have it, my adventure for the day.

Today I have been puttering about the house doing random things. That's what Sundays are like for me...random and relaxing...usually. I had two baking tasks that are due for tomorrow, so apart of this random day was something that I am supposed to blog about...baking. The first baking endeavor is for a co-worker that is leaving the organization and her last day is tomorrow. This co-worker has a milk allergy...not lactose, but an actual allergy to milk products. Baking then becomes a little trickier...but definitely NOT impossible. I decided on a very simple goody that is a common Swedish tradition. They are called chocolate balls. This is the easiest recipe ever. You mix all the ingredients together and form small balls and roll them in either coconut shavings or pearl sugar (also known as nib sugar or hail sugar). Then you refrigerate these small balls for as long as you like and serve them. They are the perfect little treat for any occasion.
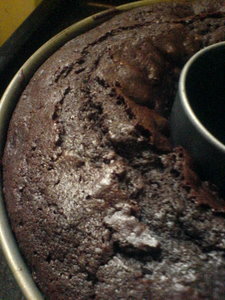
My next endeavor is what I am going to dub as Dark Almond Brownie Deluxe. Basically I took my winning brownie recipe and added dark chocolate bits, crushed almonds and a little more cocoa to make it a gorgeous ebony color. I wanted to have a really killer name instead of brownies containing such and such ingredients. The house currently carries the scent of this latest baked good, which I find delightful to my sense of smell. I will serve this deluxe brownie with whipped cream, which is also a typical Swedish thing. It may be that I have lived outside the States far to long to remember if we do the same thing, but there it is...I am giving the claim and fame to Sweden. This brownie in its original form (minus all added flattery) is one of the best things I can bake. Even though it's the simplest of recipes in my book, this brownie wins over everyone I serve it to. I have no idea why, I don't do anything special...it's just a freaking good brownie. So I think adding a few more great ingredients will hopefully only enhance the goodness. Fingers crossed this time that the old saying "too much of a good thing is a bad thing" doesn't apply to these scrumptious smelling deluxe brownies.

That's all from me on this slippery, Sunday evening.
Until my next post add a little more glamor and glitz to your basic baked goods...could completely enrich the taste.
Barefoot and Baking in the kitchen

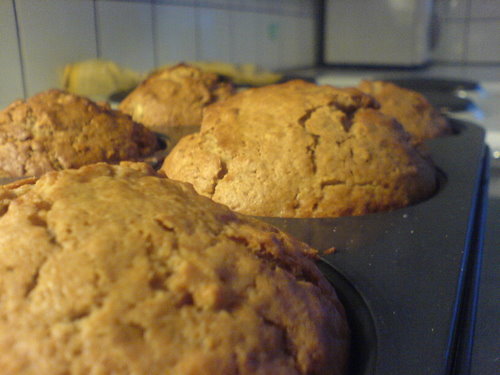
Fresh out of the oven


Chocolate balls after sitting in the refrigerator.
Good thing about these is that you can stack them
and they will not get squooshed.


Recipes for Chocolate balls and Dark Almond Brownie Deluxe

Chocolate balls
100 grams margarine (you can use milk free butter, it worked the same)
1dl sugar
3 dl oats
2 tbl. cocoa
1 tsp. vanilla
2 tbl. cold cooked coffee (optional if you don't like coffee)
Bowl of coconut shavings or pearl sugar ( I usually just pour a small amount in at first and then add more if I need)
Warning: This can be very messy since you are rolling them in your hands 

Mix all ingredients together and form small balls and  roll in coconut or pearl sugar and refrigerate until eating, at least 1 hour.

Dark Almond Brownie Deluxe
1/2 C butter (melted)
1 C sugar
1 tsp. vanilla
2 eggs
1/2 C flour
1/3 C cocoa (add another tablespoon if you want it really dark)
1/4 baking powder
pinch of salt
1/2 cup crushed almonds
1/2 cup (100grams) dark chocolate bits

Mix butter, sugar, vanilla and eggs. Add flour, cocoa, baking powder and salt. Put in baking pan (9x9 works or normal brownie dish you would use)

Thursday, February 24, 2011

Heavenly combo (chocolate and mint)


Greetings from my cozy couch! I was having hope yesterday that the frigid weather we have been experiencing was slightly changing toward the springtime...but was sorely proven wrong as I watched snow flakes float from the sky today. Being back from Thailand just over a week and my body is still having a hard time adjusting to this batch of coldness.
However, despite the moodiness of the weather and my feelings about it's changes, baking is one essential thing that can bring about a small amount of joy. I have turned to Martha Stewart (surprise!) for today's baking endeavor and am attempting a new cookie called Chocolate Mint Sandwiches. On her website there is even a video of the baking queen and some Hollywood actress casually baking in her studio's kitchen. I thought just the sound of chocolate and mint together was fabulous, but watching it convinced me more that I need to give this a try. Cool thing is, it's so easy. I have successfully made the cookie dough, which is presently chilling in the fridge. Warning: if you are on a diet or are thinking about getting on one I suggest you steer clear of these scrumptious cookies. The dough alone was heavenly and I had to tell myself, for fear of making myself sick, that I was not allowed to keep "testing" it. That can be a baker's death...the testing of all your baked goodies. So in order to keep myself from forming a very large bum, I wrapped the dough in separate parchment paper packages and stuck them in the refrigerator. Since I have to do this cookie in three steps and the first one takes about an hour, I decided to start this post mid baking process. I will leave this part of the post to continue with steps two and three and then proceed with the details about those steps.
*Break*
Well I have another 10 minutes of waiting for the nearly finished cookies to be complete with the last step of dipping the cookies into chocolate for a nice glaze effect. This cookie was actually really fun to make and super yummy to taste. I will have to work extra hard tomorrow during Zumba...seeing as I just couldn't beat the temptation of tasting the dough. Although it does come to a point of chocolate overload, with the full remorse and regretfully wondering why I didn't listen to myself before indulging in more then I should. When will I ever learn this lesson? Guilt set aside...I totally recommend these cookies! They are a winner in my recipe book. Martha has once again shown me that she knows her stuff. Though I do wonder if it's she who comes up with all these recipes herself or if there is some under paid person sitting in the background making up killer recipes that cause all of us work harder at Zumba.
Another break to finish up these "darn freaking good" cookies!
*Break*
Completion!!! The cookies are now in the refrigerator for the next 15 minutes until they set and then tomorrow they will be delivered to those that will have the joys of consumption.
This cookie would be great to make with kids. It's a bit messy...no matter how clean Martha looks. Dipping cookies into chocolate has the tendency to drip and get on my hands. Lick...lick. Would be a great cookie to try in a home economics course as well. Wherever you attempt it, I guarantee it will be pleasurable to your taste buds.

Until my next post enjoy the end of February and bring in the spring with a tasty treat!
Baking and Barefoot in the kitchen


Light and fluffy butter and sugar


Flour and cocoa combo


Blending the eggs well


Pouring in the cocoa mixture


Batter will be crumbly once you get it
mixed together so don't worry.


Dough formed into disk


 Pressed into parchment paper


Powdered sugar surface for rolling
out the dough easier.


Cookie cut outs


Ganache filling


Ready for applying ganache to the cookies


Makes a nice filling


Cookies pressed together ready to be refrigerated


Chocolate being melted for the dipping
process


Dipped chocolate mint sandwiches


Recipe for Chocolate Mint Sandwiches:


Ingredients

Makes 3 dozen
  • FOR THE COOKIES
  • 1 cup unsweetened Dutch-process cocoa powder
  • 1/2 cup plus 2 tablespoons all-purpose flour
  • 1/2 cup (1 stick) unsalted butter, room temperature
  • 1/2 cup granulated sugar
  • 1 large egg, room temperature
  • Confectioners' sugar, for work surface
  • FOR THE GANACHE
  • 1/4 cup heavy cream
  • 6 ounces semisweet chocolate, very finely chopped
  • 3/4 teaspoon pure peppermint extract
  • FOR THE GLAZE
  • 6 ounces semisweet chocolate, very finely chopped

Directions

  1. Make cookies: Whisk together cocoa powder and flour in a bowl. Put butter and granulated sugar in the bowl of an electric mixer fitted with the paddle attachment. Mix on medium-high speed until pale and fluffy, about 3 minutes. Mix in egg until well blended. Reduce speed to low. Add flour mixture; mix until just combined. Divide dough in half, and shape each half into a disk; wrap in plastic. Refrigerate until firm, about 1 hour (or overnight).
  2. Preheat oven to 350 degrees. Transfer dough to a work surface lightly dusted with confectioners' sugar. Roll out dough to 1/8 inch thick. Cut out cookies using a 2-inch round cookie cutter; space 1/2 inch apart on baking sheets lined with parchment paper. Repeat with remaining scraps of dough. Bake cookies until firm, rotating sheets halfway through, 10 to 12 minutes. Let cool completely on sheets on wire racks.
  3. Meanwhile, make ganache: Bring cream to a boil in a small saucepan over medium-high heat. Add chocolate. Cook, stirring constantly until chocolate is smooth. Stir in peppermint extract. Let cool slightly, 10 to 15 minutes.
  4. Spoon 1 teaspoon ganache onto the bottom of 1 cookie; sandwich with another cookie. Repeat with remaining cookies and ganache. Refrigerate until firm, about 10 minutes.
  5. Make glaze: Melt chocolate in a heatproof bowl (I just used a small pan and put the chocolate directly in it)  set over a pan of simmering water, stirring constantly. Let cool slightly. Dip one flat side of each sandwich into melted chocolate to coat; gently shake off excess. Place sandwiches, chocolate sides up, on wire racks set over baking sheets. Refrigerate until set, about 15 minutes. Cookies can be refrigerated in a single layer in airtight containers up to 2 days.

Read more at Marthastewart.com: Chocolate-Mint Sandwiches - Martha Stewart Recipes

Friday, February 18, 2011

Back to blogging

Greetings! I know that it's been a super long time since my last post. I have a great excuse for it though, my husband and I were in Thailand for a vacation. Needless to say I have not been baking in that time. I will however, start up again in the kitchen this afternoon with muffins. A classic, baked good in my recipe book that has been done so many times, the page shows the remnants of the ingredients strewn from top to bottom. Side note: I am not the most tidy of bakers...it is normal for bits and pieces of ingredients to have flown all over the kitchen, as well as, in the correct mixing bowls while I am baking.
The reason for baking these muffins, is not just so my hubby and I can savor their moist, saporous goodness. Our downstairs neighbor is returning home from a three month journey around the world and what better to come home to than freshly baked muffins. This is my way of welcoming her home and I think personally that she will like it.

This morning I was thinking of ways that I can make more people feel cared for through some areas I do best. I was imagining having a few guests for a really nice brunch, with fresh scones, fruit, cheese, coffee and milk in a lovely little saucer. I am one who enjoys my daydreams, but maybe there is a point to those moments of floating away in my mind...
This is not a long post today, but it feels good to have my fingers punching in the keys and knowing that I am once again barefoot and baking in the kitchen.

Until my next post let yourself float in your dreams just a little,
Barefoot and Baking in the kitchen

Recipe for muffins can be found on the last post, but I did a little something extra in these. I put in substitute of the berries (kiwi pieces), added 1/2 tsp. of cloves and 1 1/2 tsp. of honey. The batter tasted delicious!

Saturday, January 22, 2011

What to do with the excess?

Greetings from a very frosty and icy Sweden. After successfully cleaning our flat this morning and watching a super cheesy chick flick on the couch (total waste of brain cells) I decided to do something better with my time this afternoon. And what could be better for a baker's time then baking? Totally rhetorical question. Because I am a believer in using almost any food before throwing it out, I have had sitting in my refrigerator for the past two weeks, some yogurt that my husband didn't like the taste of. Yogurt is great in many things and my favorite thing to use it in are muffins! I have a great muffin recipe and love to make super giant muffins...you know the ones you buy at Starbucks or any other cool coffee place. Today's muffin mixture was my own concoction. The yogurt I had was flavored with apples and quince (never heard of this fruit until this yogurt, for more information...search wikipedia). The original muffin recipe I have, calls for berries, but since I didn't think this flavor of yogurt would go well with berries, I substituted pears instead. Adding a couple teaspoons of cinnamon and some oats to the whole thing, it turned out to be a really nice combination of flavors and smells. So if you are like me and don't like to waste any food, or if you just happen to have some extra yogurt sitting in the fridge, might I suggest that muffins are the way to go! Fresh and hot out of the oven these muffins are a winner! And this was a brilliant way to get my wonderful husband to eat something that he wasn't fond of from the beginning.

Until my next post try some new combos of food...you might just find the next best thing!
Barefoot and Baking in the kitchen

Frosty and icy weather is perfect for baking!


Everything has a shade of blue due to the frozen state.


 Fresh, warm, yummy muffins straight out of the oven


See the cracks...this means your muffins have baked
perfectly!


Yummy goodness!


 Six large muffins...perfect for a small group of friends
or you can freeze them as well.


Recipe for muffins ( I substitute the berries if I don't have any, also I use flavored or plain yogurt)

2 eggs
2 dl yogurt or sour cream
1dl butter or margarine (softened)
5 dl flour
1.5 dl sugar
2 tsp. baking powder
2 tsp. vanilla
2-3 dl berries or cut up pieces of fruits
1-2 tsp. cinnamon (optional)
1.5 dl oats (optional)

Whisk the eggs and sugar together. Mix in the yogurt and butter, then add the berries/fruit bits. Batter will be lumpy. Blend in dry ingredients and mix thoroughly, batter should be thick. For large muffin form, 2-3 tbsp. of batter in each. For small muffin form 1-2 tbsp. of batter. Bake at 300F or 225C for 15-20mins. Muffins should look cracked on top.
Have fun!

Thursday, January 13, 2011

Favorite Chocolate Cake


Greetings from a very white and snowy Sweden. I read on CNN yesterday that 49 of the 50 States in the U.S. have snow on the ground...seems like a lot of places are getting hit with this wintery whiteness. I like this time of year, but after spending most of my days very cold, I am ready for spring to come soon. As it does, baking helps warm me up, both from the heat of the oven and the work I put into it. For today's endeavor I decided on what I would say is my favorite chocolate cake. It's one that I have done several times and have blogged about it before. Even though it's nothing new, it's delicious taste will melt in your mouth. Tomorrow's recipients of this scrumptious cake will have satisfied their taste buds with each passing bite. Since I think this cake is so yummy, it's hard for me to not want to eat the creamy, smooth batter up completely. But since I know those indulgences result in bloated stomach aches within the hour...I have refrained...mostly. =) I cannot help lick a little bit of the left overs and make sure that it's something I would feed others, which I will have you know is partly an excuse in order to taste this rich, divine chocolate goodness. To give it an even more appealing taste and pleasure to the customers, I add a creamy frosting, drizzled on top!
 
Until my next post, delight your taste buds a little bit more.
Barefoot and Baking in the kitchen

Here is the recipe for the Dark Chocolate Cake:
Ingredients:
2 cups boiling water
1 cup cocoa powder
2 3/4 cups flour
2 tsp. baking soda
1/2 tsp.baking powder
1/2 tsp. salt
1 cup butter (softened)
2 1/4 cups sugar
4 eggs
1 1/2 tsp.vanilla

In a medium bowl pour the boiling water over the cocoa and whisk until smooth. Let cool. (could be up to 20 minutes)In another bowl sift together flour, baking soda, baking powder and salt.  In a large bowl cream together butter and sugar until light and fluffy.  Beat in eggs one at a time. Stir in vanilla. Add flour mixture and cocoa mixture alternately. Put in round pan and bake for up to one hour at 175 C or 300 F
For frosting I mix powdered sugar, butter and a little milk. I drizzle it on top, so my measurements are not always the same. You don't want to make it too thick or too runny...just in the middle somewhere. Good Luck!

Thursday, January 6, 2011

Creamy Lemon Goodness


Greetings from my kitchen! Today was a day off for us here in Sweden, so my husband and I have been taking it quite easy and relaxing. We just returned from a scrumptious lunch with my husband's boss and his wife and several others. After eating all the delicious food, I hardly feel like baking, but tomorrow sixteen people are expecting something mouth watering. For today's baking endeavor I have decided on Creamy Lemon Bars. Being the baking nerd that I am, I am signed up to received two recipe emails from Martha Stewart daily. I even have a Martha Stewart folder in my email box to help keep track of it all...a sign of a real nerd I know. However, time after time I get awesome ideas from this lady and I am proud to say that nearly 100% of the time I have succeeded. This time I am trying a rather easy recipe. It consists of only 6 ingredients and the portion says it's for 16...I am hoping so since I only have enough for one batch. Here's hoping! Lemon cakes, bars, cookies, etc. are amongst my favorite desserts. With their tangy, citrus zing I love the sense my taste buds experience when I bite into something lemon. Perhaps it's the effect of being forced to eat lemons when I was baby...thus producing entertainment for the onlookers, whatever the cause, I thoroughly enjoy lemon flavored things. If you like lemon things as well, be sure to try this super easy recipe.

Until my next post, let your taste buds experience the goodness of life!
Barefoot and Baking in the kitchen

Sugar, butter and salt mixture


Smooth and silky


Only 6 ingredients for this delicious treat


Adding the flour


At first this mixture will be crumbly


After a little while of mixing, you can pick
it up and press it together to form the crust


Press into the pan and poke with a fork all over


Egg yolks


Eggs and condensed milk


Lemon juice added, I just used concentrate instead
of real lemon juice from lemons. I think it works
the same


Nice and creamy look


Readied crust


Filling and crust ready to be baked


Oven time!


Creamy Lemon Bars Recipe

Ingredients

Makes 16
  • 1/2 cup (1 stick) unsalted butter, room temperature, plus more for pan
  • 1/2 cup confectioners' sugar, plus more for dusting
  • 1/4 teaspoon salt
  • 1 cup all-purpose flour (spooned and leveled)
  • 4 large egg yolks
  • 1 can (14 ounces) sweetened condensed milk
  • 3/4 cup fresh lemon juice (from about 3 lemons)

Directions

  1. Preheat oven to 350 degrees. Butter an 8-inch square baking pan. Line bottom with parchment paper, leaving an overhang on two sides; butter paper.
  2. Make crust: Using an electric mixer, beat butter, sugar, and salt until light and fluffy. Add flour, and mix on low just until combined. Press dough into the bottom and 1/2 inch up sides of prepared pan; prick all over with a fork. Bake until lightly golden, 15 to 20 minutes.
  3. Make filling: In a large bowl, whisk together yolks, condensed milk, and lemon juice until smooth. Pour over hot crust in pan; return to oven, and bake until filling is set, 25 to 30 minutes. Cool completely in pan.
  4. Refrigerate until filling is firm, about 2 hours or up to 3 days. Using paper overhang, lift cake onto a work surface; cut into 16 squares, and dust with confectioners sugar.


Read more at Marthastewart.com: Creamy Lemon Squares - Martha Stewart Recipes

Friday, December 31, 2010

Charred Failure

At this current moment our flat is totally engulfed in the smell of charred cookies. That's right...I said charred. Here's my realization at this point...which is nothing new to me...you win some and you lose some. Today is New Year's Eve and we are having some friends over for a small get together. As both my husband and I are pretty tired and he is not feeling 100% we decided not to kill ourselves by being major party animals this year. Our plans exist of dessert, games and fun with some friends. Dessert...that's what I am good at right! I mean I love thinking of new things to make, finding new recipes, trying new things...I get such a kick from it. So I ordered a new baking book, a classic Swedish book called 7 types of Christmas cookies. There are not only 7 recipes in this lovely, little red and white checkered book. It is filled with holiday cookies and most I have never done. So you can imagine..from a baker's heart...that getting a new recipe book and trying a new cookie would be "like the best thing ever!" Yesterday I flipped through the book and found a Danish cookie recipe that called for all the ingredients I currently had, so I thought this Danish cookie is a freaking winner. It's the easiest recipe I have ever done. It consists of three...yep...three ingredients. Marzipan, powdered sugar and one egg white. Please somebody tell me how you can go wrong with only these ingredients? As I mixed these things together, it looked relatively cookie-like and I was happy to have such a simple thing to make for a party. I stuck them in the oven and waited. After just a few minutes the smell of almost done cookies started to drift in the air. I ran to check on them, because the recipe said to bake them for 15 minutes. They were probably in there for around 5. When I went in, I immediately realized something went COMPLETELY wrong...and I was utterly shocked, since it was only...ahem...three ingredients. The content of this Danish cookie had all melted together to form a huge rectangular cookie-bar thing and it was bubbling. Well since it didn't look totally done, I thought I would leave it in there. My big freaking mistake. Not several minutes later, I smelled charred cookie smell...which we all know smells the same no matter what kind of cookie you are baking...charred sugar STINKS!!! I ran into the kitchen and found my...what were supposed to be nice Danish cookies for New Year's Eve...turned into a black bubbling mess. At least it wasn't for a customer...that would have been tragic. However, I am still a bit peeved that my first attempt at my new cookbook has ended in such a way. Next on my list for this evening are brownies...wish me luck!

Until my next post, have a Happy New Year and try not to burn the kitchen down.
Barefoot and Baking in the kitchen