Thursday, April 28, 2011

Baking with Love...always makes it better!

First let me just say a HUGE sorry for not being consistent with posting. I have many excuses for not writing, sickness, tiredness, laziness, and many more...
I have missed posting, but apparently not enough to actually write these past 3 weeks.=)  Instead of trying to remember all the details from the previous baking endeavors, I will only write about one and then in the end include all the recipes from what I have been trying.
I am quite careful to not write too personal things in this public blog, even though in person I am very personal and deep, I choose to refrain here. However, I want to share a little about a friend of mine that I work with...
Rose and I doing some of her training

Some of you may be wondering why the heck am I writing about a friend, when I am supposed to be writing about cakes for goodness sake?! Well my little friend actually had a birthday in which I baked for. Let me introduce my friend, her name is Rose and she is (as of Monday) four years old. I met Rose when she was about two and a half. Rose was born with a brain handicap and requires some special training (called Pattening) to help stimulate her brain and body to work together. Without exposing too much of my little friend, I will just say that I have really enjoyed my learning experience with her training, as well as, getting to know Rose. When her mom asked me to make a "big" cake for her fourth birthday, I was honored, because I knew this cake would be made with love from my heart. I mean I really love to bake anyhow, but when it's for a special friend, there is a connection that goes beyond just baking a regular cake. First step was to think of what kind of cake to make, I did not want to make a cake that I hadn't made before. Call me crazy...but that's how I role, I love trying new things and sharing them with new people and old friends. So I came up with a simple idea of making a delicious white cake (which I have made before...oh well), slicing it in half, filling the middle with strawberry jam and cream, putting the two pieces together and covering the whole thing with whipped cream and strawberries. In my head it tasted and looked great! Second step was to buy the ingredients, third step was to bake it, fourth step was to slice it, fill it and put it back together and the final step was the cream cover and sliced strawberries. I confess I totally had my husband help me to slice this big cake and then assemble it back together. In those moments, I am not the most calm person, I am usually stressed that the cake will fall apart and then I get irritated at my poor love who is just there to help me. Anyway...that aside...the cake did turn out just as lovely as I imagined and I attribute that to baking with love. I was so proud to deliver this special cake to my little friend and I was really excited to try it. My first bite made my mouth long for more and more...it was heavenly. I think my friend Rose also enjoyed her birthday cake, as well as the other guests that were present.

Rose and her mom Toryn at her b-day party!


At this moment my kitchen is filled with smells of lemon and almond flavors. I am currently baking a Lemon Pound Cake, found on thepioneerwoman.com. I hope it tastes as good as it smells. This recipe is super easy and doesn't take too much time to whip up. If you enjoy lemony things, I would suggest you give this one a shot.

Below are pictures from Rose's birthday cake and recipes of some super yummy goodies.

Until my next post (hopefully not more than a week away), enjoy your spring!

Barefoot and Baking in the kitchen

Ingredients for the cake


Whipping the eggs until they are like meringue


Should have soft peaks


Light and fluffy eggs and sugar


Adding sour cream


Adding flour


Adding the meringue mixture


Cake batter ready to be baked


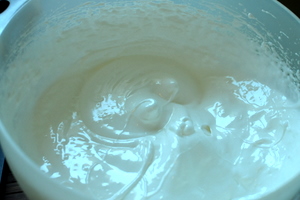
Whipped cream for the middle filling


Strawberries (yes I used frozen...as the season for
strawberries is not here yet)


Cake sliced in two...product of the hubby!


More of the sliced cake, it's a bit uneven, but it worked


Strawberry jam and whipped cream mixed for the
inside filling


Becomes silky smooth and tastes incredible...
hard not to eat it by the spoon fill.


Spread on the bottom sheet of cake


Both sheets now put together and the white blob
in the middle is some extra cream. Cover a little hole.


Covering the top with cream.


All covered


Strawberries atop


Being creative!


These strawberries stayed on the side, thanks to
a tip my hubby gave, to dry off the defrosted berries.
When you defrost strawberries, they are really hard
to work with, but drying them each off and each
sliver really worked. In the end, I suggest fresh
strawberries!


Presented at the birthday party. To give it a real
spring feeling I placed thimble weed (hardly looks
like a weed) around.


Recipe for Heavenly Cake:

Ingredients

  • 2 3/4 cups sifted cake flour
  • 4 teaspoons baking powder
  • 3/4 teaspoon salt
  • 4 egg whites
  • 1 1/2 cups white sugar
  • 3/4 cup butter
  • 1 cup milk
  • 1 teaspoon vanilla extract
  • 1 teaspoon almond extract
  • 1/2 C Strawberries

Directions

  1. Measure sifted flour, baking powder, and salt; sift together three times.
  2. In a mixing bowl, beat egg whites until foamy. Add 1/2 cup sugar gradually, and continue beating only until meringue will hold up in soft peaks.
  3. Cream butter or margarine. Gradually add remaining 1 cup sugar, and cream together until light and fluffy. Add sifted ingredients alternately with milk a small amount at a time, beating after each addition until smooth. Mix in flavorings. Add meringue, and beat thoroughly into batter. Spread 1/2 batter in a 15 x 10 x 1 inch pan then spread cut strawberries on top and then pour rest of batter.
  4. Bake at 350 degrees F (175 degrees C) for 30 to 35 minutes. Cool cake in pan 10 minutes, then remove from pan and transfer to a wire rack to finish cooling. This cake may also be baked in two 9 inch round pans for 30 to 35 minutes, or in three 8 inch round pans for 25 to 30 minutes.

Recipe for Lemon Pound Cake:

Ingredients
  • 2 sticks Unsalted Butter, Room Temperature
  • ½ cups Butter Flavored Crisco
  • 3 cups White Sugar
  • 5 whole Eggs
  • 1 teaspoon Almond Extract
  • 2 Tablespoons Lemon Extract
  • 2 Tablespoons Lemon Zest
  • 3 cups All Purpose Flour, Sifted
  • 1 cup Skim Milk ( I substituted sour cream instead, because I don't like to use milk, I think it's too dry)

Preparation Instructions

Use a stand mixer for this batter!!
Prepare a bundt pan by greasing it with a bit of shortening and sprinkling in a bit of flour. Cover all the surfaces with a very fine layer of flour – shake out excess. DO NOT PREHEAT THE OVEN!
1. Cream together the butter, Crisco and sugar until fluffy.
2. Add eggs, one at a time, mixing until incorporated.
3. Add extracts and zest.
4. Into the creamed mixture, alternately add the flour and milk, ending with the flour (I do three flour additions and two milk).
Spoon the batter into the pan, distributing it evenly. Once all the batter is in the pan lift the pan and drop it on the counter once to remove the air bubbles. Place the pan on an oven rack in the center of your oven. Turn the oven on to 275 degrees F and let the cake bake for 90 minutes. When you pull it out make sure to let it rest for 10 minutes before inverting it onto a cooling rack. You can choose to glaze the cake, but I love the crispy crust without a glaze!


Recipe for Sticky chocolate brownie muffins with fudge and coconut:
Okay just a quick side note....this is seriously one of the best things I have ever tasted and baked. It deserves it's own post, but I made it over 3 weeks ago and so I can't remember all the things from that endeavor. I do remember that it was amazing and rich (so rich, my hubby and I couldn't eat our whole muffin in one sitting and it sat in the fridge for several days being nibbled on by us.) Absolutely a winner! Try it and serve it to friends, I promise you will woo and win them over with this delectable goodness. 

Ingredients for muffins:

3/4C butter/margarine (softened)
4 eggs
2C sugar
1C flour
1C shaved coconut
1 tbsp. vanilla
1 pinch of salt
1/3C cocoa powder

Fudge sauce:

1/3C chopped chocolate pieces
1/8C butter/margarine
2 tbsp. light syrup
1/4C whipping cream

Blend together the eggs and sugar, do not over beat it. Mix in butte. Blend together the dry ingredients and mix together with other mixture. Fill muffin forms with batter. I used a big muffin form so this recipe only made 6, but it can also make 12. Bake 8-10 minutes (not more). In a saucepan, bring to boil, butter syrup and cream, remove from the stove and stir in the chocolate pieces. Drizzle sauce over muffins before serving, muffins should be cooled a little, so that the sauce can stay on top when you serve it. Adding some strawberries slices makes the whole experience even better! Enjoy.


Saturday, April 2, 2011

Barefoot and Baking...and a babyshower!


Greetings on this new April Fool's Day! Can't believe how fast the past year flew by me...but I know I will continue to say those exact words the older I become. I didn't have a chance to post last week, because I was insanely busy. Barefoot and Baking in the kitchen had 2 dessert orders and1 baby shower all in a matter of  2 days. Might not seem like much for a bakery (which I am not), but I was not only baking for the baby shower, I was hosting it as well. And as many of us can attest, hosting is a lot more then plopping down some cookies and saying "Eat Up!" Since I live in a country where the concept of a baby shower is a foreign idea, I had to improvise a little, as not to completely overwhelm the new mom to be with our big American celebrations. The guest list was roughly 35 ladies and I think in total we were 32. In my small European flat, that is quite a significant amount of bums to find space for. It was crowded, it was loud, there was laughter, crying (babies), screaming (small children), drinks spilled, gifts opened and dessert devoured. Since this is not a typical Swedish tradition to bring gifts before the baby is born, I worked out a way of giving one big gift that people just paid into. I saw the awesome idea of a diaper cake online and thought it looked fairly easy and super cute. The easy part, definitely took my husbands incredible idea skills to help form the basis of the cake (getting all those diapers to sit together in a nice circular motion). He actually was the main assembler, but with out my ability to tie a string around those diapers, they wouldn't have stayed. =)
Aside from the baby shower, I had my usual weekly baked good I deliver on Fridays (which I didn't have this week, hence the fact that I am writing about the past) and one luncheon that I made my scrumptious brownies for. Unfortunately, the luncheon was canceled, so I shared the goods with a few friends. My regular weekly baked good was French Silk Pie. Totally a chocolate lover's dream.
I heard it was on the sweet side, so if you are not into a lot of sugar, you can always put less in. My trick though, is knowing that something is rich and sweet and that people can only take a little bit of it, and they will not forget it. It's a psychological thing. (I am making this up)
Next week's endeavor is going to be really exciting. I found a new recipe by...can you guess? Martha Stewart of course! It's called Chocolate Coconut Cheesecake Squares. Looks absolutely divine. If you must have the recipe immediately to try, then check out Martha's website, otherwise I will post next week and include the recipe. This week's recipe will be that infamous French Silk Pie.

Until my next post..I suggest you check out the blog The Pioneer Woman, she has awesome stuff going on.
Barefoot and Baking in the Kitchen


Pie crust ready to go in the oven


Mixing sugar and margarine


Cocoa added


Vanilla


Mix well


Firs of four eggs, each needs 5 minutes
mixing time.


Nice peaks


Second egg


Getting fluffier


Third egg


Silkier


Silky and smooth


Nice mousse texture


Fourth and final egg


Nice French silk style


Pour into baked pie crusts


Refrigerate


Add whipped cream with sprinkled
chocolate slivers on top before serving.
I don't have pictures of that final process.


French Silk Pie Recipe

Pie Crust (makes 1 pie):
1 cup flour
1/2 tsp. salt
1/3 cup  margarine
2 tbsp. ice water
Mix flour and salt  add in margarine and water. Form a dough ball and then roll out and put into pan.  Bake 15 minutes (or until golden brown) at 350F or 225C

French Silk Mousse:
1/2C butter(softened)
3/4C sugar
3 tbsp. cocoa
1 tsp. vanilla
2 eggs
Cream butter and sugar, add cocoa and vanilla, beat until smooth. Beat 1 egg at a time for 5 minutes into the mixture. Should be silky smooth. Pour onto crust and chill for at least an hour. Add whipped cream and sprinkled chocolate pieces before serving.

Enjoy!!!

Tuesday, March 22, 2011

Beyond baking borders


Greetings from my couch...where I am eating a piece of pineapple pie and drinking my new favorite hot drink, consisting of hot water, fresh lemon juice, sliced pieces of ginger and honey.  Since I am barefoot and baking in the kitchen, my posts are primarily consisting of baking adventures, however in this post I will broaden my field just a little..nothing outside the kitchen...but I want to share a super yummy meal that I made last night. I am an avid soup and bread fan and when I find a good soup recipe I feel my recipe book becomes more complete. Last night we had a few guests over and so I decided that I would win them over with my amazing soup skills. The soup was made with leek and potatoes and creme fraiche. Creamy in it's consistency, this soup is melt in your mouth goodness. Served on the side was home made rosemary and sunflower bread. Confession: made in our bread machine...every baker has their weakness. I recommend this combo as the flavors in the soup and bread complimented each other perfectly. For dessert, I served pineapple custard pie. Last week, we bought a fresh pineapple (definitely better in Thailand) and made sweet and sour vegetables for dinner. Since we had half of it left over which needed to be used I thought about combining it with a normal pie crust as the base and then covered with custard. It looked great and I think it tasted okay, but here is my suggestion. Since it was a fresh pineapple, the taste became a little more bitter and that taste unfortunately took over too much for me to say this was one of the best desserts ever. However, I think if you want to make this...which I am sure I have totally convinced you with my incredible advertisement...use canned pineapple. It's sweeter to begin with and I think (but no guarantees) that it will taste better. If it still taste bitter, then I suggest you throw away my recipe. Who wants crap dessert...not me!
All in all I think our dinner was a success, the guests were happy, which is a good thing. So I would recommend winning your guests over with this steaming bowl of  creamy soup, rosemary bread and pineapple pie.

Until my next post, branch out beyond your normal boundaries and share the goodness with others.
Barefoot and Baking ( and cooking) in the kitchen

Chopped Leeks and Potatoes


 Melting butter


Chopped garlic


Cooking leeks


Potatoes added


Bringing to a boil


Finished product


Bread baking in the machine. I just added rosemary
and sunflower seeds to the recipe. You can use your
favorite bread recipe.


Pie crust in the beginning stages


Forming dough


Nice and shaped in the pie dish


Chopped pineapple


Baked pie, please excuse the eaten sides,
this picture was taken after it was served


Recipes for soup and pie

Leek and Potato soup
2 tbsp. butter/margarine
2 garlic cloves
3 large leeks(purjolök in Swedish)
5-7 potatoes (medium to large is fine)
1/2 tbsp. thyme
1/2 tbsp. basil
1 tbsp. oregeno
1/2 tsp. rosemary (optional)
2 bay leaves
3.5-5 C. vegetable stock (make sure the water is covering the potatoes, I add more if needed)
1 C. creme fraiche

Melt the butter in a large pan, add farlic and cook 1 minute. Add leek and cook for 2 minutes. Add potatoes, herbs and stock, bring to boil, then cook on lower hear for 25 minutes. Cool and then transfer 1/2 the soup to the blender or mash it in the pan. return to the rest of the soup. Stir in creme fraiche. Sprinkle shredded cheese for serving.

Pineapple pie
Crust:
1 C. flour
1/2 C cold butter
pinch of salt
2 tbsp. ice water

Mix the dry ingredients, cut in butter add ice water and continue working until dough forms. Roll out and put in pie 9" form

Chop pineapple into small pieces pour on the crust.

Custard
Either buy already made or powdered and follow instructions. I had a box of custard mix and I made 4 portions which was enough to cover the entire pie.

Served with hot tea or coffee!

Monday, March 14, 2011

Streusel your way into their hearts


Greetings! Today has begun the official transition into spring...or at least I hope so. The snow is nearly melted and there is, despite the chilliness, a wind that ushers in the glories of springtime. My tulips and daffodils are starting their ascent and are popping their little heads out of the ground. I really enjoy this time of year and as always I enjoy baking, no matter what season it is. I was not able to blog last week about my baked good, because I was battling a cold. But alive and thriving this week, I have two new recipes to share with you.
The first recipe which I did last week, was my own creation. Now before you think...AMAZING, she's the next Martha Stewart ( I kind of wish) let me assure you that this creation was super simple and anyone skilled or not skilled can do it. It was sort of like the raspberry trifle I made last year, but instead I used bananas and a few other goodies. I used pound cake (recipe found under Raspberry Trifle Post) as the base, crumbled it up and pushed it into the bottom of a glass bowl (enough for 12 people). Afterwards I mashed bananas with some cloves into a bowl and then spread it on top of the pound cake. Then I used whipped cream on top and sprinkled chopped chocolate and almond bits on top. Chilled it in the refrigerator for 30 minutes before serving.  It looked fabulous and I hate to say it, but in my cold-state, I forgot to take any pictures of this lovely chilled dessert. But here's where your part comes in, you can just imagine all the ingredients I stated and put them together and hopefully you will see a nice dessert you can serve to anyone. My next dessert, which is being served tomorrow morning,  is a streusel topped coffee cake. I got this recipe from a good friend of mine and it is currently filling my house with exceptional smells as it bakes. I have been wanting to make a good coffee cake for a while and I think this recipe hit the target for me. It consists of cardamom as it's main flavoring and cinnamon in the streusel. Yummy! This cake was super easy and quick to whip up. If you have 30 minutes or so to spare, you can have a hot, fresh coffee cake ready to serve to visiting friends. This I would totally recommend with a steaming cup of coffee.

Until my next post...enjoy the sights and smells around you.
Barefoot and Baking in the kitchen


Streusel topped coffee cake


Getting ready to bake


Recipe for Streusel Topped Coffee Cake
1 egg
3dl sugar--->1 Cup
100 grams butter/margarine (softened)--->1/4 Cup
3dl milk--->1Cup
7.5dl flour--->3 Cups
4tsp. cardamom
4tsp. baking powder
2tsp. vanilla

Streusel topping:
100 grams butter (softened--->1/4 Cup
3dl sugar--->1 Cup
3dl oats--->1 Cup
2tsp. cinnamon
1dl chopped almonds (optional)--->1/4 Cup
(Note: Measurements were converted online, so I am not sure if they are exact. This is the hard thing with living in a place where I bake with deciliter measurements, but also use my American measurements too. Hopefully your cakes will turn out.)

Mix the sugar and egg together until creamy. Add butter and milk and stir (will be lumpy). Then add dry ingredients stir and pour into baking pan. In a separate bowl mix streusel mixture and then sprinkle on top of cake batter. Bake 225C or 400F for 15-30 minutes. ( I am currently baking and this cake has been in for about 30 minutes and still not done. So it does take a while, but it might go faster for you)

Enjoy!!